
Our Hamptons Getaway Transformation
I wanted to share one of my most favorite Before & After stories of all times: the radical transformation of our walk-out basement, aka. Hamptons Getaway. The main challenge was to open up and modernize an enclosed, outdated space, and convert it into a bright and spacious studio apartment.


©Natura Interiors
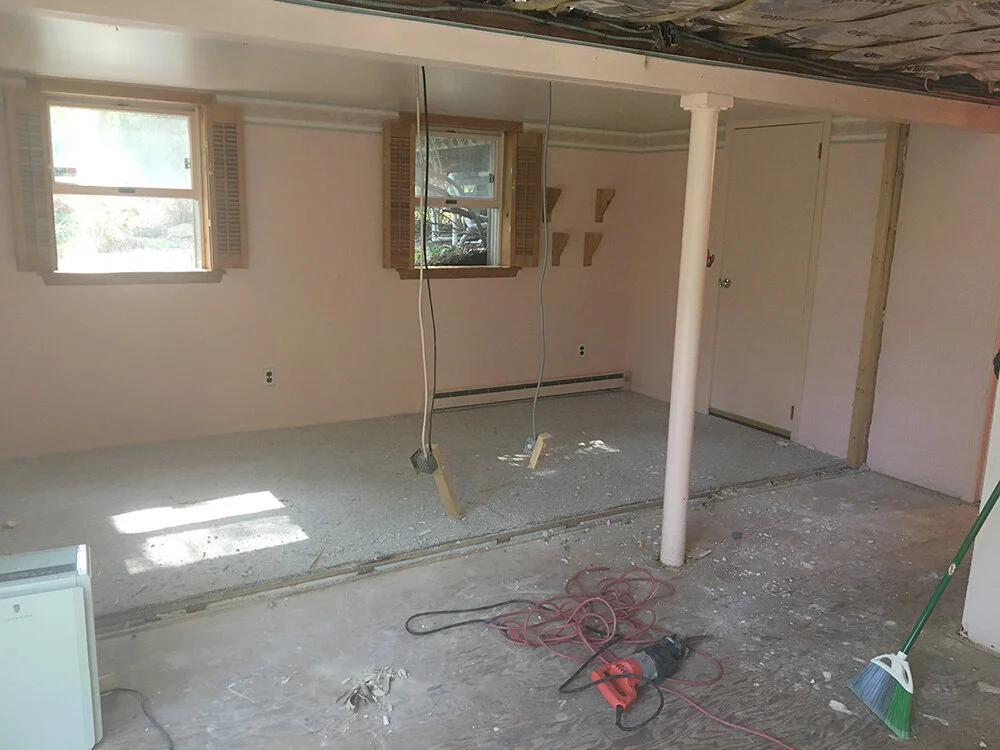
1. What is hiding behind those walls?
The first step was all about the demolition...something my husband Captain Andy is quite fond of! While I was busy drawing plans and sourcing products, Andy and Dave McMahon, our contractor and electrician, knocked down walls, removed drop ceiling tiles, tore out mauve carpet (yes mauve) with plywood underlayment, pulled out old sheetrock and insulation. I don't want to tell you the stuff we found in the walls...
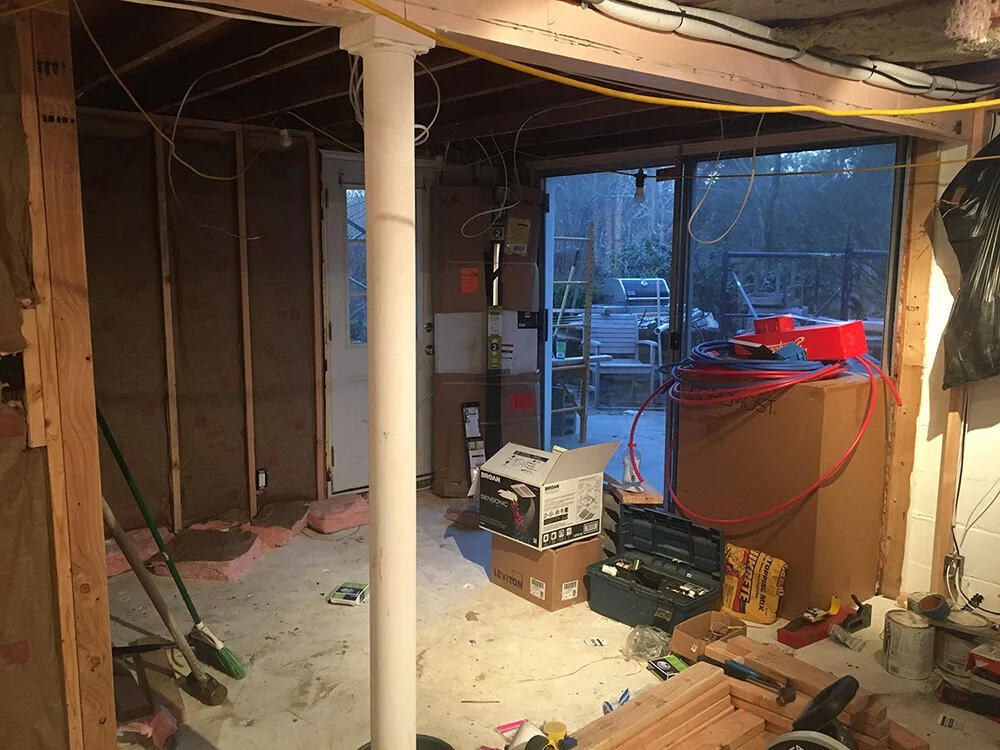
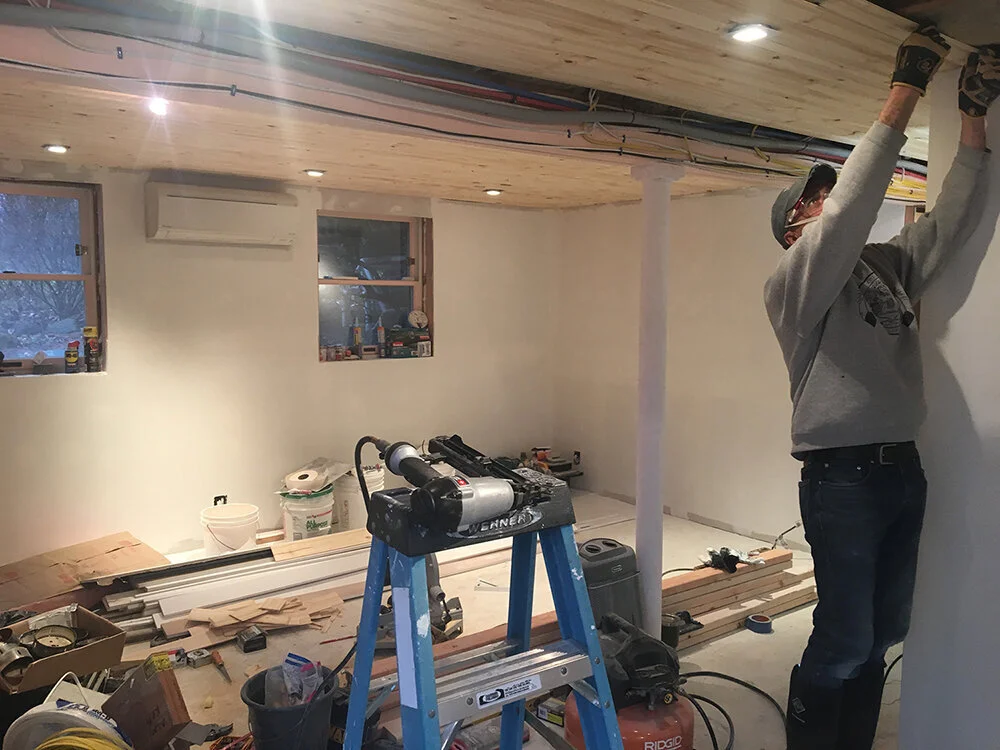
2. …And in with the new
Once we opened up the space (and I say "we" with a wink), the next step was to update the electrical and plumbing systems, which were dangerously old. The removal of the dropped ceiling and existing flooring, gave us almost an additional 12” to our ceiling height, and this in turn allowed us to create a more efficient wiring system. We installed an all-wood ceiling, with shallow recessed lights on a dimmer. We painted the ceiling Benjamin Moore Super White, the walls BM White Ice and used BM Chantilly Lace on all trim. This created a cool and refreshing architectural envelope. We also replaced the existing (and rusty) sliding doors with new Armstrong gliding patio doors. Andy couldn't contain himself with joy and started to pole dance!


©Natura Interiors
3. Oh my, the bathroom
Next, we focused on the bathroom. Honestly, I never set foot in the original bathroom. I simply took a photo (see Exhibit A below) and ran away! Well, I actually returned to the drawing table to develop several layouts, and came up with a more spacious and comfortable design. Inspired by a Scandinavian sauna, I chose to include wood elements, a smoky blue vanity and crisp white finishes. We installed radiant heating under floor tiles and a vent with integrated BlueTooth speaker. Quite an upgrade from Exhibit A, no ;)


©Natura Interiors
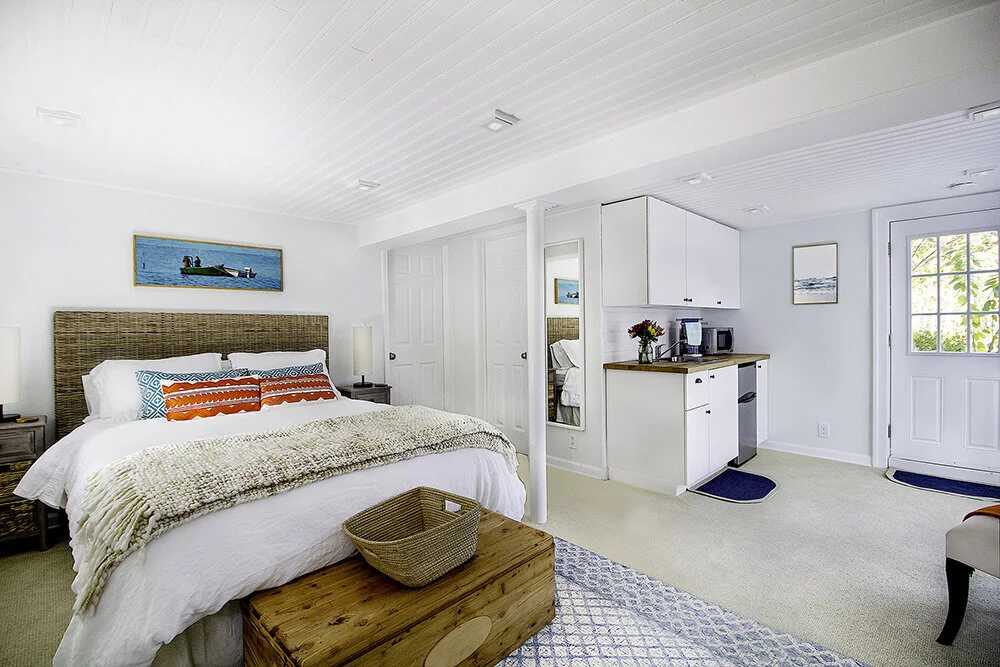
4. The kitchenette
An important goal was to make the guest studio independent from the rest of the house. So we added a kitchenette with cabinets, stainless steel sink, microwave and mini-fridge. We chose white IKEA Sektion cabinets, butcher-block countertop and a white subway tile backsplash. We kept the kitchenette minimal, fresh and functional.

©Natura Interiors
5. The furnishings: Icing on the cake
As a color palette, inspired by the joy of summer, I balanced the cool white envelope with orange and aqua accents, interwoven with natural textures. A raffia headboard by Pottery Barn, a vintage cedar chest and comfy wool throw added a sense of coziness to the space. I chose crisp white linen, aqua and off-white window treatments, and ocean-themed artwork. A white dresser, flanked by two his & hers skinny wardrobes, allowed for a large wall-mounted flat screen TV. I included table lamps with raw linen shades at each side of the bed, to complement the overall lighting. And the natural light and views to the garden help to create such a sense of serenity....

©Natura Interiors
…The Moment of Glory
The whole process took us approximately 7 months to complete. That final day — when the project was all wrapped up — was a true moment of glory. Honestly I did not want to leave the studio...it felt so clean, refreshing and inviting. Writing this blog post has allowed me to see the entire process, from start to finish, and I am so thrilled with the outcome!
Thank you for reading along! Did anything about this story surprise you? Be sure to leave a comment below :)
Warmly,
Alejandra